
Making Star Wars Escape Pod Christmas Ornaments
Every December a small group of friends where I work get together for a Christmas ornament exchange. There are ten people in the group and each person makes ten copies of a custom ornament. We get together and each person gets one of each of the ornaments. The members of the group are all world class sculptors, model makers and designers at Disney Imagineering so as you might imagine, the ornaments can be pretty over the top!
This year, having just completed building a replica of the Escape Pod filming model from Star Wars: A New Hope, I thought it would be fun to make smaller version for my ornament. A miniature of the miniature if you will.
As I would need to make at least ten copies (I always make more to give to family and friends at Christmas) it would be necessary to mold and cast the ornaments in resin. The first step was to create a 3D computer model that could be used to 3D print the original parts which would then be molded and cast. Details on the 3D model were optimized for the size of the ornament and the restrictions of the 3D printer to be used. The ornament would end up 1/3 the size of the original studio scale model I had built or about 5 ¼ inches long by 2 1/2 inches in diameter.
Once the 3D model was complete I divided it up into the separate parts for printing. The objective was to cast the ornament in as few pieces as possible. The main body of the ornament could be cast in one piece but the four main engine nozzles and three smaller thruster nozzles would have to be cast as separate parts and then glued onto the body. The parts were split up and bases modeled that included the registration keys for making the mold halves. This ended up saving a lot of time later when creating the two part molds for each part. The pattern parts were printed in a high resolution UV cured SLA resin.
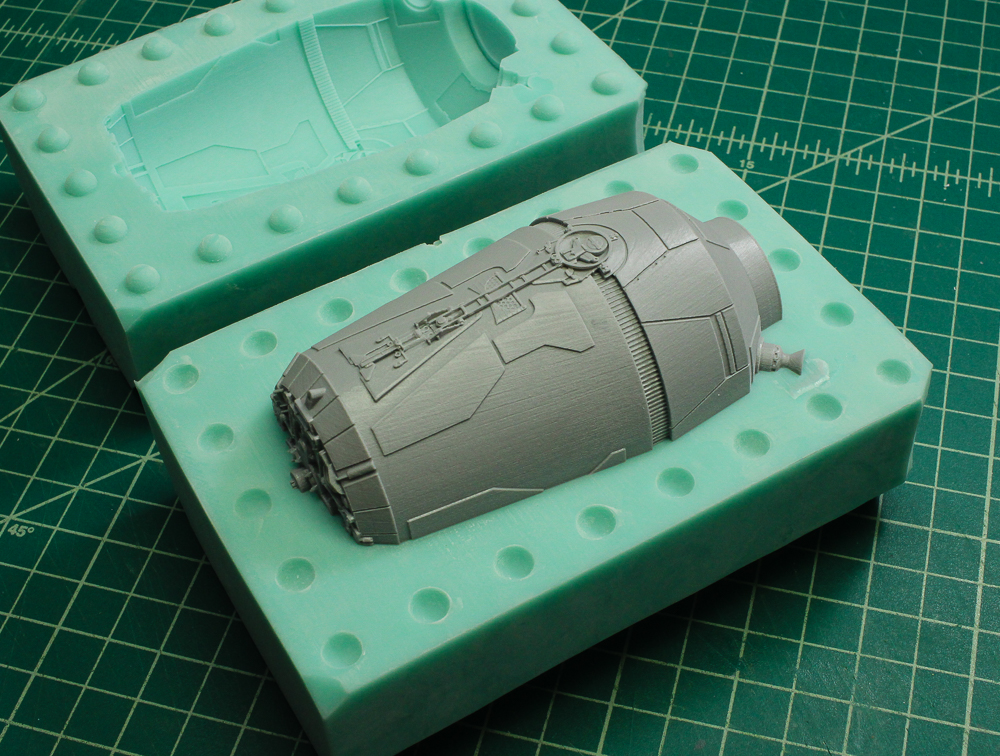
Here are the 3D printed masters for the main body mold and the silicone mold halves that were made from them. You can see the little hemispherical positive and negative mold keys that were part of the 3D printed patterns and help the mold halves fit together in perfect registration.


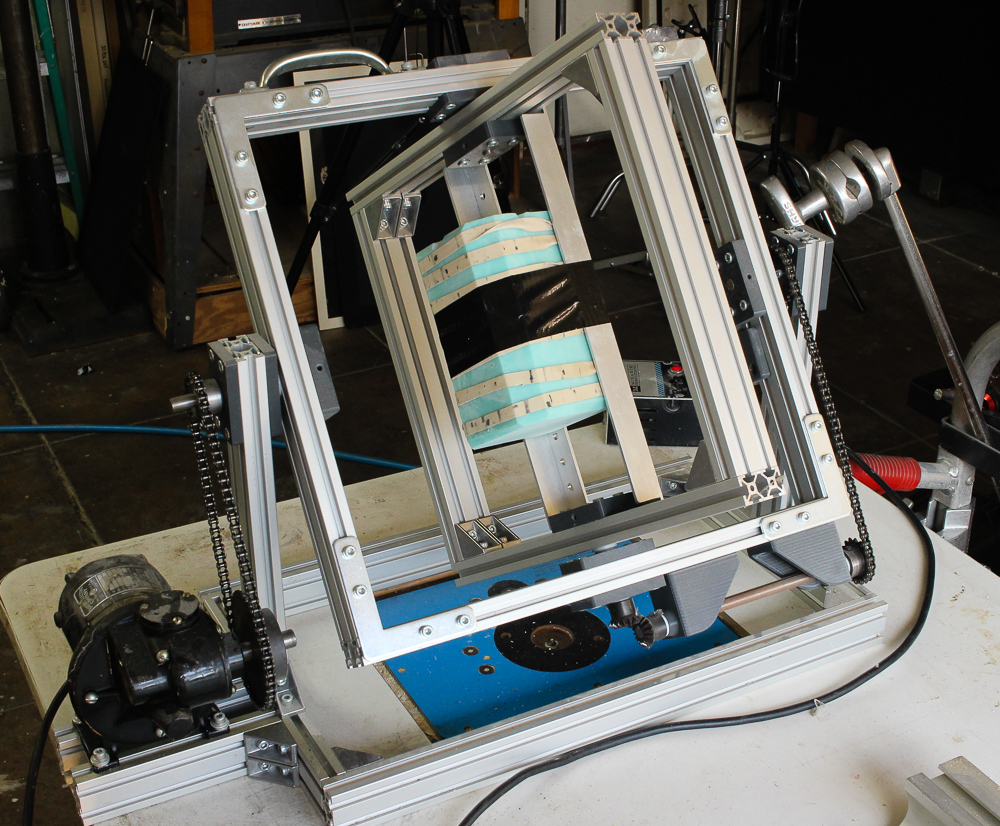
An objective when making an ornament is to make it as lightweight as possible so it will hang nicely on the tree branch without weighing it down. If the body of the ornament was cast solid it would have weighed a ton! The solution was to rotocast the ornament. Rotocasting is a process where a small amount of resin it poured into the mold which is then closed up and rotated in a random manner causing the resin to flow around the inside of the closed mold gradually building up a hollow shell as it cures. My rotocaster has two counter rotating frames, which tumble the mold automatically. The resin takes about 20 minutes to cure and when the mold is opened I have a hollow shell casting. These ornaments only ended up weighing about 50 grams each, which is fairly light for the size.
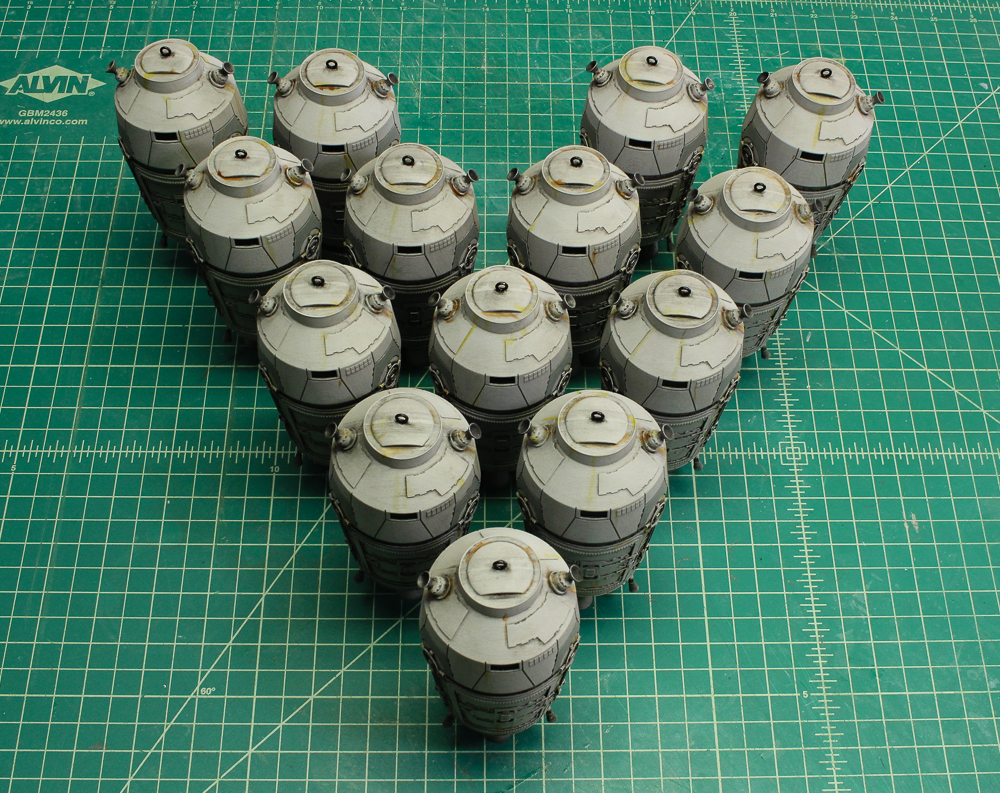
In the end, I cast enough parts to make two-dozen ornaments! Now that’s a lot of holiday cheer!

Little two part silicone molds were made for the engine nozzles, again from 3D printed masters that had been prepared with mold keys for alignment. Since these tiny parts could be solid they were cast in a pressure chamber, which helps to eliminate air bubbles in the resin castings.

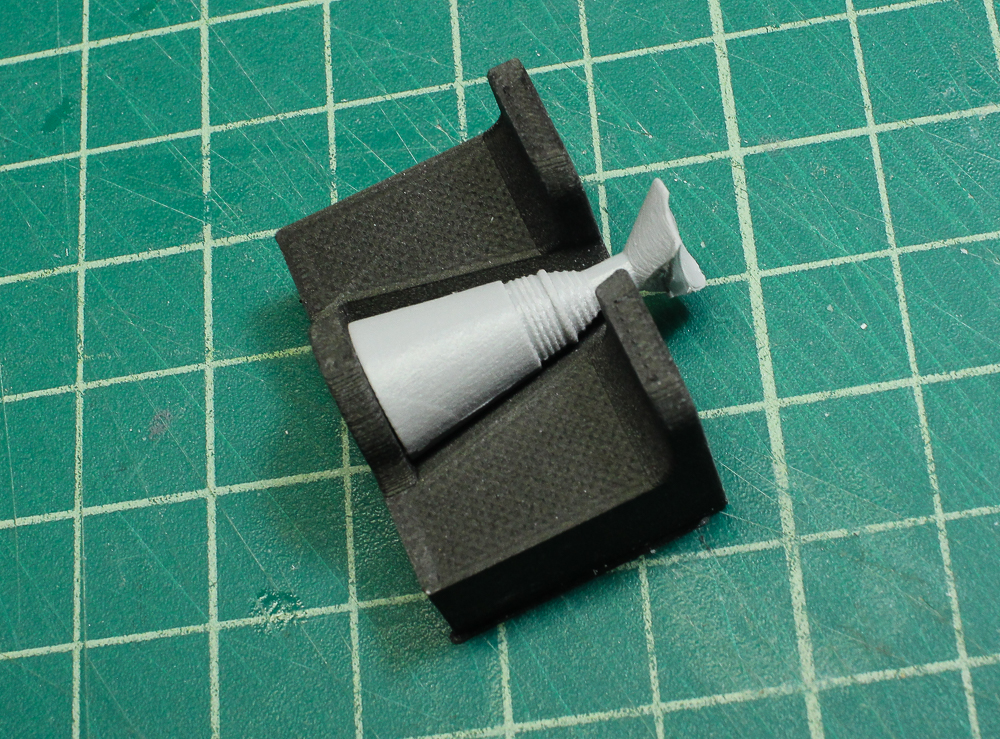
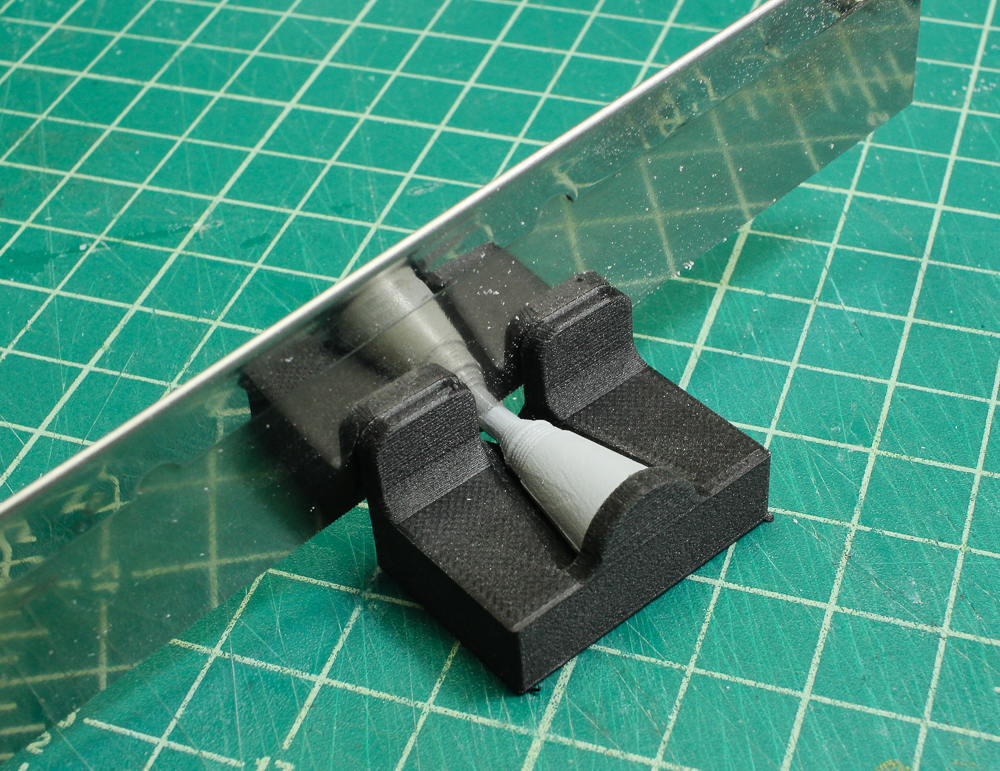
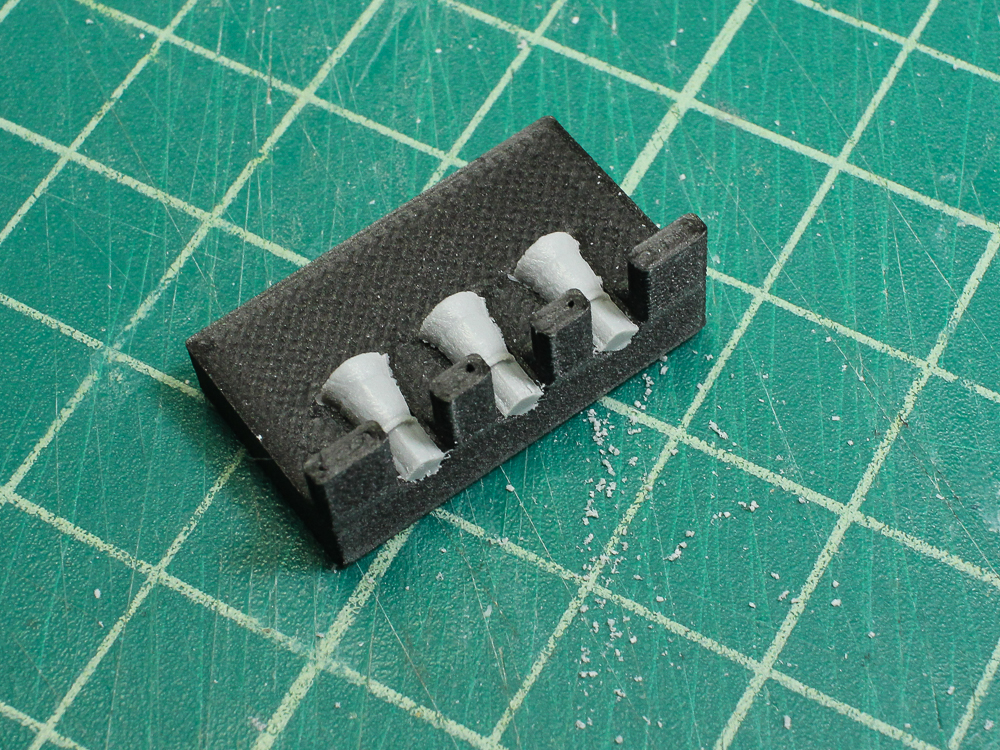
One challenge was to figure out a way to quickly and accurately trim the nozzles to the proper length and drill tiny holes in the end of each part for the little brass rods that would be used to hold them in place on the ornament. The solution was to use the same 3D computer model to create 3d printed trim and drill jigs. Each nozzle casting was held in the 3d printed trim jig and a razor saw run along the side trimming the part to length.

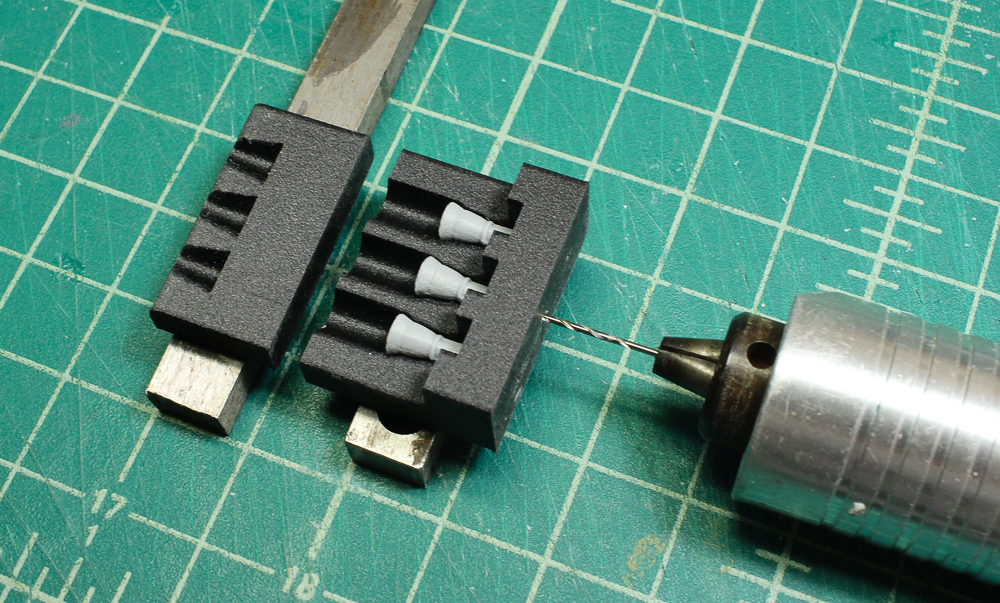
A second jig was 3D printed to allow tiny holes to be drilled on center in each nozzle. Since the little nozzles were so tiny, less than ¼ inch long, a second 3D printed jig was made to go over the top of the parts holding them in place while drilling.
Short pieces of 1/32” brass rod were glued into each of the nozzle castings to secure them in place.

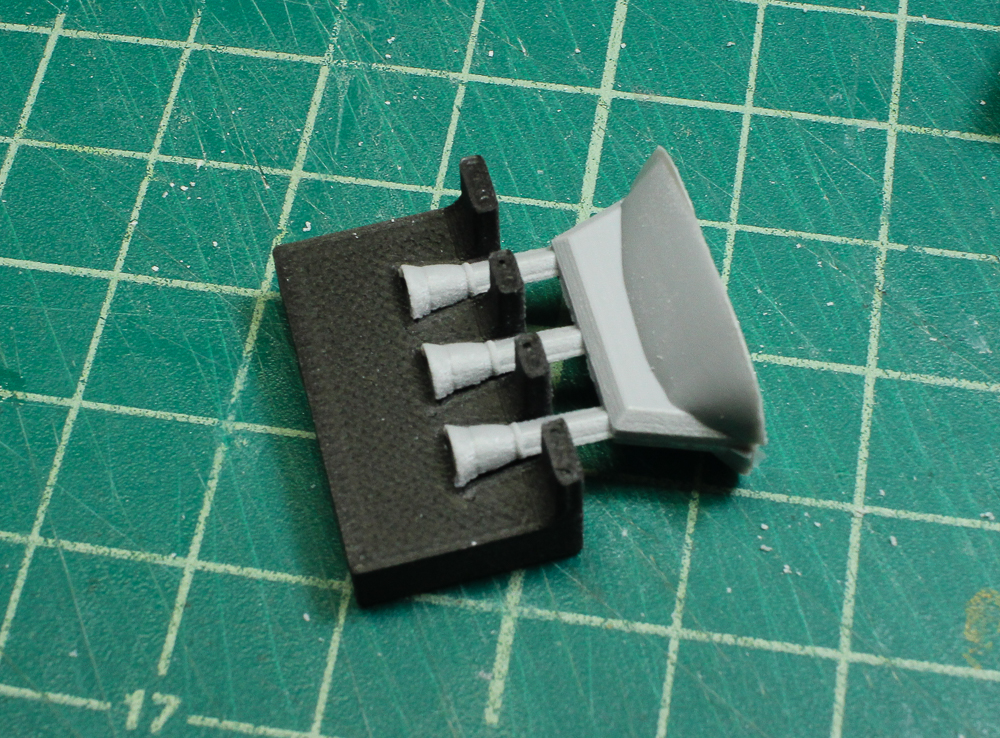
A dry fit of the various parts for one of the ornaments. The actual assembly would be done after painting.

Each ornament was first sprayed with a flat grey acrylic base coat and then weathered using oil based artist’s paints. The kind that comes in tubes. I like to use artist’s oils as they give a superior effect and the long drying time of oil paint allows for subtle blending layering.

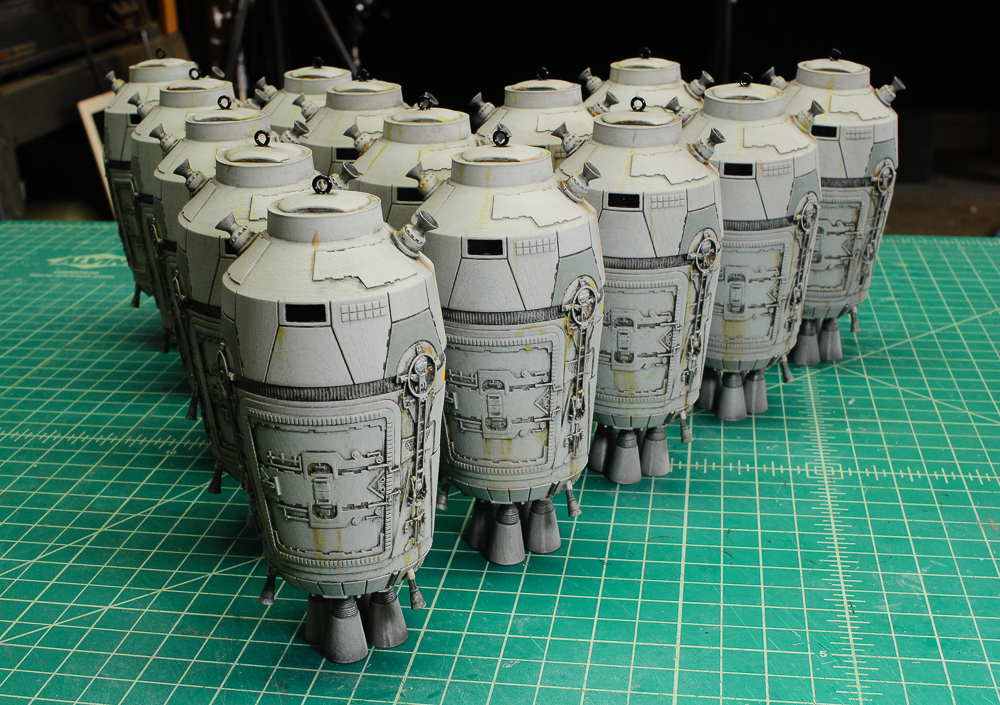
And with that the ornaments were ready to share!
Happy Holidays from Goldberg Arts.